See my previous post here to see the full process. This is an expansion on this process to bring in more or better quality imagery.
Once you have setup your coord system etc. as per previous post, you then want to zoom your screen down to the desired resolution. I find going one zoom level further in than you like is usually a good strategy.
Now you want to keep pressing “save as image” then panning your screen around to get the tiles you desire. Just use your middle mouse button, don’t zoom in and out. Give the images about 5/10% overlap.
Once you have saved all the images you need. Just read them back in to have a look at the finished result. I have saved 6 images below.
Now I want to merge them together as one image.
Raster -> Miscellaneous -> Merge
So now you just need to output your merged image in the desired coordinate system.
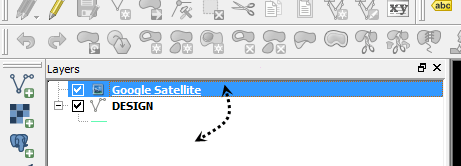
Right click the layer and press “save as”
Make sure you tick “rendered Image” and specify your desired coord system.
Give it a short moment to output
Now read into cad. Don’t forget to set your units to “meters” on command INSUNITS if you are using the metric system.
You should now have an image in CAD that is better resolution, or covers a more vast area
This is the free option for those of you looking to get some public imagery into cad. Although I imagine if you are using Civil 3D 2015 with the new bing maps functionality. This method is a little defunct. If your using Vanilla Autocad you will need to download the GEOREFIMG lisp from CAD Studio to import
Feeling Lazy… Watch the video
QGIS or Quantum GIS has much more functionality than just saving Aerial Imagery. It’s a very comprehensive and powerful free GIS tool that should be in every designers arsenal.
1. Next open up QGIS from the desktop shortcut (im using 2.8.3 Wien when writing this)
2. Go to Plugins – > Manage and Install Plugins
3. Search for the OpenLayers Plugin and Install
4. Next we need some data to quickly get your location correct. Export either a 2007 DXF or MAPEXPORT a SHP file that contains some line work of your area that’s in a known coordinate system.
5. You can either drag drop it into QGIS or just press the “Import Vector Data button”
6. QGIS should prompt you for a coordinate system for your data. If it doesnt, right Click on the layer in the layers window on the left and select “Set Layer CRS”
7. Im in Australia so I select MGA zone 56. QGIS’s coordinate system library is incredibly comprehensive so you shouldn’t have any problems finding yours here.
8. Now the imagery, go to Web -> OpenLayers plugin -> pick a imagery source. Google/Bing/Yahoo/OSM/Apple street and aerial/hybrid sources are available
9. You should now have imagery in. You might need to change the draw order to check that your line work matches up, drag drop them so that your line work is on top.
Imagery in
10. Now just get your viewport to the imagery extents you want, then turn off the linework. The image will save whatever you are looking at, in whatever coordinate system you have specified for the project.
The resolution will be what you see is what you get (WYSIWYG) so if you want a better resolution you will need to save multiple images at a closer view. See my post here on how to do that, or watch the video above.
11. Now save your image. Go to Project -> “Save As Image” and call it “Google-PSY” the PSY indicates it is in the WGS84 Pseudo Mercator Coordinate system.
12. We now need to read the saved image back in and convert it to the correct coordinate system been – MGA zone 55. Using the Warp (Reproject) from the Raster-> Projections menu.
13. Specify the “Google-PSY.png” we saved, choose the output file, Make sure you specify the source coordinate system (WGS84 – Psuedo Mercator) and the target coord system (mine is MGA zone 55)
14. Export it as a “Geotiff” and call it Google-MGA55 or whatever your coordinate system is. The Geotiff format will contain all the georeferencing information inside the file.
15. Now just use MAPIINSERT command (GEOREFIMG lisp for vanilla cad users) to import into CAD. Pow! Imagery. This also works well for stitching bits of imagery together.